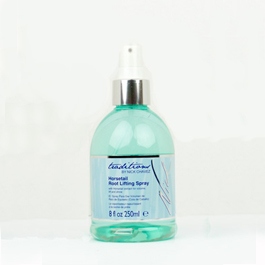
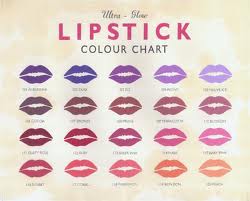
All that really needs to be said about Nick Chavez's Horsetail Root Lifting Spray is that it made my limp, fine hair look like a LION'S MANE. I am not exaggerating in the least. For those who have dreamed of huge Texas-sized pageant hair and tried every trick in the book: This. Stuff. WORKS. You just spritz the product all over the roots of your hair and fluff it with your hands or a teasing comb. Magic! I'm not prone to vanity any more than your average beauty blogger, but I can't stop fluffing my hair into ever greater proportions and admiring my handiwork in every mirror possible. I'm roaring at the cats and practicing my best "World Peace, ya'll" speech and whipping my hair around like I'm an extra in a Robert Palmer video.
You'd think I could have remembered to snap a picture, but alas. Just trust me when I say the end result after all that fluffing was not unlike this:
Yes! Glorious Adele hair you can achieve without a team of stylists. What could be better than that?
Showing posts with label how to. Show all posts
Monday, March 5, 2012
Friday, January 6, 2012
How To Curl Your Hair With a Straightener
I’ve finally figured out a method to style my hair into full, bouncy, Rita Hayworth-esque curls. And gorgeous movie star ringlets. And beachy, bohemian waves. I’m letting you in on the technique and the best part is that you probably have exactly what you need in your hairstyling arsenal right now. Yes! All you need is a straightener. How do I curl my hair with a straightener, you ask? Here are step by step instructions!
The straightener I'm using is a 1-inch flat iron by ProFashion.
Step one: Start heating up the straightener! I like to use it on the highest heat setting since my hair naturally resists curl, but set it to whatever temperature works best for you. Separate your hair into workable sections. I gather one side of my part at a time, pin up the top layers, and start working from the bottom on one side.
Step two: Take about an inch (or half inch) bit of hair and clamp the straightener VERTICALLY at the root, close to your scalp. This is the key. Holding it vertically will give you curls and ringlets; holding the straightener at a more horizontal angle results in loose, beachy waves.
Step three: Next you give the straightener a 180 degree turn. Twist it to the right so that the back plate is now facing front and your hair is wrapped around the plates. Pull your hair through until you reach the ends, as if you were straightening it like normal. It helps to go a little slowly and hold the lower end your hair even with the hair that’s already passed through the iron.
And tah-dah! Volume and curl, right before your eyes!
Tuesday, January 3, 2012
Eat Pretty! - 5 Foods to Nourish Your Hair, Skin & Nails
So it's the beginning of January and a brand new year, and everybody is motivated with goals and resolutions and ambitions to be better. Or maybe you're the type of person who loathes resolutions and sees them as precursors to failure. Whichever camp you fall into, the fantastic Kylie of Everblossom has made us all a wonderful list of the foods that nourish our hair, skin, and nails the most. Often referred to as superfoods, it's amazingly easy to incorporate them into your diet -- whether you've resolved to or not!
I've been squeezing fresh lemon juice into my water, snacking on a tasty mix of nuts and seeds, and adding spinach whenever possible. Not because of a "resolution", but because it's delicious! And the benefits to my hair, skin, and nails have been unbelievable. Check out Kylie's list and adjust your own foods accordingly; you'll be amazed at the changes!
1. Salmon - Oily fish like salmon, tuna and sardines provide the healthy omega-3 and omega-6 fats our body needs. Those good fats ensure that our skin and scalp are well hydrated. It's also an excellent source of protein, which is the building block for healthy nails and hair.
2. Leafy greens - Spinach, kale and other leafy greens are full of Vitamins A and C, which is needed to produce sebum, your body's natural skin and hair conditioner. It's also chock-full of iron and calcium, which are wonderful for strong, healthy nails.
3. Nuts & Seeds - Those omegas again! Grab a handful when you need a snack to get a good dose of healthy fats and protein. Almonds, pecans, sunflower seeds and other nuts are also full of zinc, which is proven to ward off hair loss.
4. Yogurt - Yogurt is full of calcium and zinc - lovely for strong hair and nails. What I really love about yogurt is that you can use a plain variety as a facial mask - the lactic acid makes it a wonderful exfoliant.
5. Citrus fruits - Vitamin C promotes collagen production, which plumps up skin to reduce wrinkles and signs of aging. Citrus fruits are also full of wonderful antioxidants, protecting your body from ugli-fying toxins like pollution and cigarette smoke.
I've been squeezing fresh lemon juice into my water, snacking on a tasty mix of nuts and seeds, and adding spinach whenever possible. Not because of a "resolution", but because it's delicious! And the benefits to my hair, skin, and nails have been unbelievable. Check out Kylie's list and adjust your own foods accordingly; you'll be amazed at the changes!
1. Salmon - Oily fish like salmon, tuna and sardines provide the healthy omega-3 and omega-6 fats our body needs. Those good fats ensure that our skin and scalp are well hydrated. It's also an excellent source of protein, which is the building block for healthy nails and hair.
2. Leafy greens - Spinach, kale and other leafy greens are full of Vitamins A and C, which is needed to produce sebum, your body's natural skin and hair conditioner. It's also chock-full of iron and calcium, which are wonderful for strong, healthy nails.
3. Nuts & Seeds - Those omegas again! Grab a handful when you need a snack to get a good dose of healthy fats and protein. Almonds, pecans, sunflower seeds and other nuts are also full of zinc, which is proven to ward off hair loss.
4. Yogurt - Yogurt is full of calcium and zinc - lovely for strong hair and nails. What I really love about yogurt is that you can use a plain variety as a facial mask - the lactic acid makes it a wonderful exfoliant.
5. Citrus fruits - Vitamin C promotes collagen production, which plumps up skin to reduce wrinkles and signs of aging. Citrus fruits are also full of wonderful antioxidants, protecting your body from ugli-fying toxins like pollution and cigarette smoke.
Friday, July 22, 2011
Tarte Mineral Powder Bronzer (Plus! How to Contour)
All you regular readers are surely aware by now that I have super pale skin. And I generally like it that way. Every year May rolls around I briefly consider dalliances with faux-tanning products, but ultimately opt out and embrace my natural so-white-I'm-almost-reflective pallor. Maybe the heatwave sweeping across America this week is getting to me, but now I find myself wanting the slightest hint of glow-y color, even if it just gives my face a little more warmth. I think I've mentioned before how most bronzers make me look like I attractively streaked some dirt across my face, but I've made a discovery that will have super pale girls (and even you tan ones!) everywhere bronzing up!
Tarte's Mineral Powder Bronzer in Park Ave Princess is my secret weapon this summer. It has the most natural finish of any bronzer I've ever used! Instead of obvious brown streaks, Tarte's Mineral Powder Bronzer adds a subtle glow, making your skin appear like you've been on a glorious vacation but were really, really good with the sunscreen. On your skin it's like a luminizer with slight golden brown tones and it's absolutely gorgeous. I like to dust it over my forehead, cheeks, nose, and chin, where the sun naturally hits your face. The color is buildable too, for those of you who aren't ghostly pale and want a little darker glow.
Bronzers can do way more than supply you with an I-just-came-back-from-the-tropics glow, however. It can also be used to contour; that is, define your jawline, sculpt your cheekbones, and even make your face appear slimmer! The idea is that the darker bronze shading causes shadows that will push an area inward. So you strategically apply bronzer to the hollows of your cheeks, directly under your jawline, and around your hairline and temples to create the contours that foundation can sometimes take away. Try it! You'll be amazed at the difference!
Tarte's Mineral Powder Bronzer in Park Ave Princess is my secret weapon this summer. It has the most natural finish of any bronzer I've ever used! Instead of obvious brown streaks, Tarte's Mineral Powder Bronzer adds a subtle glow, making your skin appear like you've been on a glorious vacation but were really, really good with the sunscreen. On your skin it's like a luminizer with slight golden brown tones and it's absolutely gorgeous. I like to dust it over my forehead, cheeks, nose, and chin, where the sun naturally hits your face. The color is buildable too, for those of you who aren't ghostly pale and want a little darker glow.
| Pretty glow-y skin, even on the cloudiest of days |
![]() |
| This graphic is from Kevyn Aucoin's genius manifesto Face Forward. You want a copy, trust me! |
Bronzers can do way more than supply you with an I-just-came-back-from-the-tropics glow, however. It can also be used to contour; that is, define your jawline, sculpt your cheekbones, and even make your face appear slimmer! The idea is that the darker bronze shading causes shadows that will push an area inward. So you strategically apply bronzer to the hollows of your cheeks, directly under your jawline, and around your hairline and temples to create the contours that foundation can sometimes take away. Try it! You'll be amazed at the difference!
Wednesday, July 13, 2011
False Eyelashes: A Step by Step Tutorial
No other beauty product changes your look quite like false eyelashes. Whether you choose long, dramatic lashes or a subtle, more natural pair, false eyelashes make a gorgeous difference! Check out this before and after of my own lashes:
What a difference, right?! False eyelashes have a notorious reputation for being extremely difficult to apply, so many ladies don't even bother attempting them. Funny story: one of the first times I ever applied false eyelashes was for a Halloween party (naturally). Things were just getting underway when my dashing boyfriend discreetly pointed out that one of my lashes was barely hanging on! Yikes! It certainly takes practice, but isn't false eyelash application a worthy skill to have? I definitely think so! I'm proud I've finally mastered it and am thrilled to put together this step by step tutorial so you can, too.
First, here's exactly what you'll need:
A good pair of false lashes is a given. This is my very favorite pair, Salon Perfect #105. They're ridiculously long (when it comes to lashes I say go big or go home, but that's a personal preference), extremely easy to find, and crazy cheap. I'm talking $3 cheap, these lashes are a fantastic bargain! If the length is a little too much for you, Salon Perfect also has a selection of lashes that look natural as well. There are tons of brands and styles to choose from!
You're also going to need some eyelash glue. Make sure you get the kind for strip lashes, not individual ones (I've made that mistake before). I'd also recommend glue that is waterproof and dries clear. Most formulas do, so chances are you'll be fine with whatever you pick up. Again, lots of brands to choose from!
Liquid eyeliner and mascara are necessary final steps to make sure the false lashes blend as seamlessly as possible. I apply the liner over the lash band to disguise it and any glue that may have gone on too thick. The mascara incorporates your real lashes with the falsies just in case you didn't apply them close enough to your natural lash line. This prevents the dreaded "layered" look! Here I'm using black InColor FabuLiner and Tarte's Lights Camera Lashes mascara.
Now that your tools are assembled, you can peel the eyelash out of the holder and start applying a thin layer of glue to the lash band. It's helpful if you squirt a drop out of the tube first, then drag it over the lash band. Make sure the layer is even and don't skimp on the ends! If you get too much glue on, that's okay. It will take a little longer to dry and some glue may be visible, but that's where the eyeliner comes in later. Once the glue has been applied, you need to wait about fifteen seconds so the glue can get tacky (slightly sticky).
Once the glue is tacky, place the lash as close as possible to your natural lash line. Apply it to the middle first, then position the two ends. This is the most difficult part. It takes precision to apply them correctly, but you also have to work quickly because the glue is drying! If you don't get it right at first, keep practicing and it will get tremendously easier. Just peel the glue off and apply it again!
Now repeat with the other eyelash. The glue will likely be super visible at this point; don't worry, that's normal! It looks white until it dries, but I promise, it will dry. Again, the more glue you apply, the longer this will take. Patience is key! Hang out, play with lipstick colors, Facebook-stalk someone, read some more articles at Applied Glamour... ;-)
So yay, now the glue is finally dry and you're ready to put on the finishing touches! As I've mentioned, liquid eyeliner is extremely useful for disguising the eyelash band and making the lashes appear more natural. I'm partial to eyeliners with a felt tip pen like a Sharpie. Just fill in over the lash band like you would apply eyeliner to your natural lash line. Mascara will help blend your real lashes in with the false ones and also give the falsies a little extra lift! Urban Decay even sells a mascara specifically formulated for false eyelashes, but really any mascara will do. Just barely sweep the mascara wand over the lashes; you don't need much at all.
And voila! There you have it! Here's how it will look once you're all done. Yes, they're a little unbelievable, but so what? That's the point! Nobody has colored eyelids either, am I right?
Yes, false eyelashes can be intimidating to apply at first and you may experience a few mishaps starting out, but don't get discouraged. I promise it gets easier! Keep practicing, don't skimp on the glue, and apply the lashes as close as possible to your natural lash line. Long, thick eyelashes will be yours in no time!
![]() |
| With concealer only--next time I need to remember a little blush!!! Geez Louise! |
![]() |
| With concealer, false lashes, and eyeliner |
First, here's exactly what you'll need:
A good pair of false lashes is a given. This is my very favorite pair, Salon Perfect #105. They're ridiculously long (when it comes to lashes I say go big or go home, but that's a personal preference), extremely easy to find, and crazy cheap. I'm talking $3 cheap, these lashes are a fantastic bargain! If the length is a little too much for you, Salon Perfect also has a selection of lashes that look natural as well. There are tons of brands and styles to choose from!
You're also going to need some eyelash glue. Make sure you get the kind for strip lashes, not individual ones (I've made that mistake before). I'd also recommend glue that is waterproof and dries clear. Most formulas do, so chances are you'll be fine with whatever you pick up. Again, lots of brands to choose from!
Liquid eyeliner and mascara are necessary final steps to make sure the false lashes blend as seamlessly as possible. I apply the liner over the lash band to disguise it and any glue that may have gone on too thick. The mascara incorporates your real lashes with the falsies just in case you didn't apply them close enough to your natural lash line. This prevents the dreaded "layered" look! Here I'm using black InColor FabuLiner and Tarte's Lights Camera Lashes mascara.
Now that your tools are assembled, you can peel the eyelash out of the holder and start applying a thin layer of glue to the lash band. It's helpful if you squirt a drop out of the tube first, then drag it over the lash band. Make sure the layer is even and don't skimp on the ends! If you get too much glue on, that's okay. It will take a little longer to dry and some glue may be visible, but that's where the eyeliner comes in later. Once the glue has been applied, you need to wait about fifteen seconds so the glue can get tacky (slightly sticky).
Once the glue is tacky, place the lash as close as possible to your natural lash line. Apply it to the middle first, then position the two ends. This is the most difficult part. It takes precision to apply them correctly, but you also have to work quickly because the glue is drying! If you don't get it right at first, keep practicing and it will get tremendously easier. Just peel the glue off and apply it again!
So yay, now the glue is finally dry and you're ready to put on the finishing touches! As I've mentioned, liquid eyeliner is extremely useful for disguising the eyelash band and making the lashes appear more natural. I'm partial to eyeliners with a felt tip pen like a Sharpie. Just fill in over the lash band like you would apply eyeliner to your natural lash line. Mascara will help blend your real lashes in with the false ones and also give the falsies a little extra lift! Urban Decay even sells a mascara specifically formulated for false eyelashes, but really any mascara will do. Just barely sweep the mascara wand over the lashes; you don't need much at all.
And voila! There you have it! Here's how it will look once you're all done. Yes, they're a little unbelievable, but so what? That's the point! Nobody has colored eyelids either, am I right?
Yes, false eyelashes can be intimidating to apply at first and you may experience a few mishaps starting out, but don't get discouraged. I promise it gets easier! Keep practicing, don't skimp on the glue, and apply the lashes as close as possible to your natural lash line. Long, thick eyelashes will be yours in no time!
Friday, June 10, 2011
How to Find Your Signature Scent Part 3: Buying Unique Fragrances
Once you start learning what sort of scents you like, it's easier to pick out notes and elements and find different, more unique fragrances than the examples I gave in my last post. Those scents are great, don't get me wrong, I own several myself, but I think the elusive Signature Scent™ should be something a little more unusual, don't you?
One of the greatest resources for unusual, unique fragrances is The Black Phoenix Alchemy Lab. I've written about them before and am still loving my Marie perfume oil. It's violets and tea roses and I get complimented on it all the time! I'm not sure it's my signature scent (I think I want something a little more in the oriental family), but I'm definitely enjoying it. Go check out my BPAL article for more information about this fantastic company and the amazing fragrances they offer. A great way to test their perfumes is to order "Imps", a tiny little sample of the perfume oil for only $3. You can order up as many as you like and experiment to your heart's content without a real commitment! Plus they'll also send Imps at random when you order a full size perfume. Clever!
Another amazing resource for unusual perfume is LuckyScent.com. I've never even heard of most of the brands and perfumes they offer, so you're guaranteed to find something unusual that no other woman will be wearing. You can search by fragrance family or notes if you're stumped by the unfamiliar names. LuckyScent also offers sample sizes of most of the perfumes for $3-5 so you can try before you buy! It's particularly great because what they offer tends to be on the more expensive side. I was okay with ordering up a $25 perfume oil from BPAL before I actually tried it, but I definitely wouldn't be cool with dropping $270 on the perfume Daphne Guinness created without trying it first (I did try it, and I think it's for the sort of woman who wears Chanel No. 5, which unfortunately isn't me...yet).
The best way to get a truly unique fragrance is to mix scents with wild abandon! Layer two or three fragrances at once for a fragrance to suit you and only you. This isn't for beginners and will require even more experimentation, but how fun would it be to have your very own unique blend? I've loved Demeter's Fragrance Library ever since I read about them when I first started obsessing over magazines (quite a long time ago!). They have scents for almost anything you can imagine, and are designed to be layered and mixed. Personally I'm thinking Lava Rock plus Kamikaze would be a winner for me, but you could literally come up with thousands of combinations.
So tell me! What are your favorite scents? Have you found a signature yet, or are you still looking, like me? Do you remember your very first fragrance? (Mine was Tommy Girl. And some perfume from The Gap! Oh yes!) Do you relegate scents to certain eras in your life? (Tommy Girl will always smell like 6th grade, while I wore Dolce & Gabbana Light Blue during high school). What perfume would you never, ever wear again? I wanna know!
| Black Phoenix perfume oil and Imps |
| Lucky Scent samples: Le Labo Rose 31 and Commes de Garcons Daphne |
The best way to get a truly unique fragrance is to mix scents with wild abandon! Layer two or three fragrances at once for a fragrance to suit you and only you. This isn't for beginners and will require even more experimentation, but how fun would it be to have your very own unique blend? I've loved Demeter's Fragrance Library ever since I read about them when I first started obsessing over magazines (quite a long time ago!). They have scents for almost anything you can imagine, and are designed to be layered and mixed. Personally I'm thinking Lava Rock plus Kamikaze would be a winner for me, but you could literally come up with thousands of combinations.
So tell me! What are your favorite scents? Have you found a signature yet, or are you still looking, like me? Do you remember your very first fragrance? (Mine was Tommy Girl. And some perfume from The Gap! Oh yes!) Do you relegate scents to certain eras in your life? (Tommy Girl will always smell like 6th grade, while I wore Dolce & Gabbana Light Blue during high school). What perfume would you never, ever wear again? I wanna know!
Wednesday, June 8, 2011
How to Find Your Signature Scent Part 2: All About Fragrance Families
A fragrance counter can be tricky to navigate if you don't know what kind of scents you like. Perfumes usually fall into one of four major families: floral, woody, oriental, and fresh. Many fragrances overlap categories, too. Here's what it all means:
Floral scents are pretty self-explanatory. These are the most traditionally feminine fragrances, and popular notes include rose, lily pf the valley, peony, orchid, and tuberose. Other variants are white florals, which typically have notes of jasmine, gardenia, or freesia to create a grand statement; and soft florals, which include elements of iris, vanilla, or citrus to create a fresh or powdery floral fragrance. Some great floral scents to start testing are Viktor and Rolf Flowerbomb, Yves Saint Laurent Parisienne, Michael Kors Very Hollywood, Robert Piquet Fracas, Prada Infusion d'Iris, and anything from Marc Jacobs.
Woody scents have strong, intense fragrance elements like amber, sandalwood, cedarwood, or patchouli. These scents tend to be bold and spicy. Dry wood fragrances include tobacco, leather, and a little citrus to keep it fresh and from being too overpowering. Mossy woods typically evoke forests and include green or citrus notes as well as oak and other wood scents. Oriental woods tend to be the most sexy, with notes of amber and sandalwood. If you want to test a woody scent, spray Narciso Rodriguez For Her, Gucci Rush, Donna Karan Cashmere Mist, the original Lolita Lempicka, or Prada Amber to start.
Oriental fragrances tend to be exotic and sexy. The very first oriental scent was Guerlain's Shalimar, which was developed in the 1920s and is still available today. Fragrance elements mix spices like cloves, cinnamon, and vanilla with heady florals like rose and orchid. Other elements include sugars, nutmeg, cardamom, and sweet spices. There's a lot of variation among the scents in this category; "gourmand" is the term given to scents that contain foody elements like sugar and spice (and everything nice!) . Some great oriental or gourmand fragrances to start testing are Aquolina Pink Sugar, Vera Wang Princess, Gucci Guilty, Burberry Brit, Georgio Armani Code, and Tocca Brigitte.
Finally, fresh scents are clean and energizing. Common notes are lime, lemon, grapefruit, and mandarin. Fresh green fragrances will have notes of leaves, herbs, or green tea, while fresh water fragrances will incorporate elements of ocean breezes or fresh dew. Some will have an added element of amber to give the scent a little sexiness. Some fresh fragrances you can try out include the DKNY Be Delicious fragrance line, Dolce and Gabbana Light Blue, Issey Miyake Eau d'Issey, and any scent from the aptly named brand Fresh.
These are meant to be general, overall guidelines. Not every fragrance fits into one distinct category. Most will have elements from two or even three fragrance families. One of my favorite perfumes, L by Gwen Stefani (which is also one of the only celebrity fragrances I really like), has elements of both floral and fresh notes. To see how fragrances blend and fit together, consult the Fragrance Wheel! It's perfume's answer to the color wheel and was developed in 1983 by Michael Edwards. It's extremely helpful to have a visual representation of how this all fits together.
Try a few scents from each category to learn what fragrances most appeal to you. Once you discover a preference for oriental florals or dry woods, selecting a perfume becomes that much easier.
Part 3 of selecting a fragrance is all about how to find the most unique scents, coming soon! You don't want to miss it!
Floral scents are pretty self-explanatory. These are the most traditionally feminine fragrances, and popular notes include rose, lily pf the valley, peony, orchid, and tuberose. Other variants are white florals, which typically have notes of jasmine, gardenia, or freesia to create a grand statement; and soft florals, which include elements of iris, vanilla, or citrus to create a fresh or powdery floral fragrance. Some great floral scents to start testing are Viktor and Rolf Flowerbomb, Yves Saint Laurent Parisienne, Michael Kors Very Hollywood, Robert Piquet Fracas, Prada Infusion d'Iris, and anything from Marc Jacobs.
Woody scents have strong, intense fragrance elements like amber, sandalwood, cedarwood, or patchouli. These scents tend to be bold and spicy. Dry wood fragrances include tobacco, leather, and a little citrus to keep it fresh and from being too overpowering. Mossy woods typically evoke forests and include green or citrus notes as well as oak and other wood scents. Oriental woods tend to be the most sexy, with notes of amber and sandalwood. If you want to test a woody scent, spray Narciso Rodriguez For Her, Gucci Rush, Donna Karan Cashmere Mist, the original Lolita Lempicka, or Prada Amber to start.
Oriental fragrances tend to be exotic and sexy. The very first oriental scent was Guerlain's Shalimar, which was developed in the 1920s and is still available today. Fragrance elements mix spices like cloves, cinnamon, and vanilla with heady florals like rose and orchid. Other elements include sugars, nutmeg, cardamom, and sweet spices. There's a lot of variation among the scents in this category; "gourmand" is the term given to scents that contain foody elements like sugar and spice (and everything nice!) . Some great oriental or gourmand fragrances to start testing are Aquolina Pink Sugar, Vera Wang Princess, Gucci Guilty, Burberry Brit, Georgio Armani Code, and Tocca Brigitte.
Finally, fresh scents are clean and energizing. Common notes are lime, lemon, grapefruit, and mandarin. Fresh green fragrances will have notes of leaves, herbs, or green tea, while fresh water fragrances will incorporate elements of ocean breezes or fresh dew. Some will have an added element of amber to give the scent a little sexiness. Some fresh fragrances you can try out include the DKNY Be Delicious fragrance line, Dolce and Gabbana Light Blue, Issey Miyake Eau d'Issey, and any scent from the aptly named brand Fresh.
These are meant to be general, overall guidelines. Not every fragrance fits into one distinct category. Most will have elements from two or even three fragrance families. One of my favorite perfumes, L by Gwen Stefani (which is also one of the only celebrity fragrances I really like), has elements of both floral and fresh notes. To see how fragrances blend and fit together, consult the Fragrance Wheel! It's perfume's answer to the color wheel and was developed in 1983 by Michael Edwards. It's extremely helpful to have a visual representation of how this all fits together.
Try a few scents from each category to learn what fragrances most appeal to you. Once you discover a preference for oriental florals or dry woods, selecting a perfume becomes that much easier.
Part 3 of selecting a fragrance is all about how to find the most unique scents, coming soon! You don't want to miss it!
Tuesday, June 7, 2011
How to Find Your Signature Scent Part 1: The Basics
| MoonBelle Photography |
Fragrance is undoubtedly one of the most personal beauty products a person can own. Scents react to your own body chemistry, so what smells amazing in the bottle or on someone else just may not work for you, and vice versa. Whether you're looking for a Signature Scent or want to build up a fragrance library of perfumes for different moods and seasons, Applied Glamour steps in to assist and eliminate confusion! This three part series on perfume will take you through every aspect of fragrance selection, from the initial sniff to exactly what "woody oriental" means to where to find the most unique scents.
First, some terms to decode: Top notes refer to the fragrance elements you smell immediately after the perfume is sprayed. They're strong and will be your first impression of the perfume, but they also tend to evaporate fairly quickly. Middle notes are what you smell after the top notes have faded, usually up to an hour later. They're the "heart" of the fragrance and the main elements of the perfume. The base notes are what add depth and complexity to a perfume, since it's the element that lingers long after the top and middle notes have faded. You can start detecting them as early as thirty minutes after applying the perfume, but they often take much longer to appear. This will affect how long your fragrance lasts.
If you have no idea where to begin, just pick up a perfume bottle that appeals to you and see how you like the fragrance inside. Ideally, you want something aesthetically pleasing as well as smelling amazing. It's completely okay to judge a fragrance by its bottle. Alternatively, pick a fragrance to test from a fashion house whose clothes or accessories you admire. If you have a collection of Pucci scarves, try Miss Pucci or Vivara perfumes (the bottles are stunning, too). If you dream of a Chanel handbag, see how you like Coco Mademoiselle. It's not completely foolproof, but it's a great place to start.
The best way to find a fragrance you love is to test it on your own skin! Try one scent on each wrist at a time and wear it around for a while to really get a feel for the top, middle, and base notes, determine how long the scent will last, and most importantly, how it smells on you. It can be time consuming, yes, but the process is ultimately worthwhile.
Stay tuned for parts two and three on How to Find Your Signature Scent! Coming soon: all about fragrance families and secrets for finding truly unique perfumes.
Wednesday, February 16, 2011
Clueless About Eyeshadow?
Some of the most frequent questions I'm asked regard eyeshadow application. You've probably mastered applying one shade, maybe you can even apply another color to your crease, but then what? Is your eyeshadow completely gone, or worse, smeared by the end of the afternoon? Here are the best products for those who want their eyeshadow to stay put and look professionally applied. Which, I suspect, is pretty much everyone!
The first step is to prime your eyelids. Primers provide a thicker base for your eyeshadow to "stick" to, so it will last longer. Urban Decay makes a variety of amazing eye primers to suit everyone's tastes, but my favorite is Sin. It's lightly shimmery but won't show through underneath your eyeshadow. I like to wear it alone sometimes when I'm in a hurry. If you blend it well, it can even multitask as a highlighter.
Next, I recommend one of these fabulous eyeshadow kits from Too Faced. There are four different kits, each containing nine eyeshadows for three different looks: daytime, classic, and night. The best thing about these kits is that they come with an instruction card for each look, detailing step-by-step how each color should be applied plus clever tips. Also included is a dual ended applicator, one end with traditional sponge tips and the other end an eyeliner brush that also works in your crease. Purchasing each eyeshadow separately would total up to $73, but each of these kits is a super deal at only $35!
Like Urban Decay's primers, there's a kit to suit everyone. The Natural Eye shadow kit is a lovely collection of a variety of shimmery neutrals; the Romantic Eye kit contains gorgeously soft feminine colors; the Naked Eye kit is filled with nude shades that flatter everyone; and the Smoky Eye kit is the most dramatic with darker colors.
Keep a bottle of makeup remover and a few Q-Tips close by just in case you make a mistake and need to touch up again, especially if you aren't so confident about applying eyeshadow. It can take a bit of practice.
Lastly, spritz your face with Urban Decay's All Nighter Makeup Setting Spray. It provides extra hold for the eyeshadow you painstakingly applied using something they call "Temperature Control Technology". It prevents all your makeup from melting when it's hot and humid and cracking when it's cold and dry. The spray is lightweight and nonsticky and supposedly even lasts through a crying spell. I can't personally vouch for the tears, but this is nonetheless a fantastic product. I keep it by the door so I can spray my face on my out and my makeup lasts all day, eyeshadow included!
The first step is to prime your eyelids. Primers provide a thicker base for your eyeshadow to "stick" to, so it will last longer. Urban Decay makes a variety of amazing eye primers to suit everyone's tastes, but my favorite is Sin. It's lightly shimmery but won't show through underneath your eyeshadow. I like to wear it alone sometimes when I'm in a hurry. If you blend it well, it can even multitask as a highlighter.
Next, I recommend one of these fabulous eyeshadow kits from Too Faced. There are four different kits, each containing nine eyeshadows for three different looks: daytime, classic, and night. The best thing about these kits is that they come with an instruction card for each look, detailing step-by-step how each color should be applied plus clever tips. Also included is a dual ended applicator, one end with traditional sponge tips and the other end an eyeliner brush that also works in your crease. Purchasing each eyeshadow separately would total up to $73, but each of these kits is a super deal at only $35!
Like Urban Decay's primers, there's a kit to suit everyone. The Natural Eye shadow kit is a lovely collection of a variety of shimmery neutrals; the Romantic Eye kit contains gorgeously soft feminine colors; the Naked Eye kit is filled with nude shades that flatter everyone; and the Smoky Eye kit is the most dramatic with darker colors.
Keep a bottle of makeup remover and a few Q-Tips close by just in case you make a mistake and need to touch up again, especially if you aren't so confident about applying eyeshadow. It can take a bit of practice.
Lastly, spritz your face with Urban Decay's All Nighter Makeup Setting Spray. It provides extra hold for the eyeshadow you painstakingly applied using something they call "Temperature Control Technology". It prevents all your makeup from melting when it's hot and humid and cracking when it's cold and dry. The spray is lightweight and nonsticky and supposedly even lasts through a crying spell. I can't personally vouch for the tears, but this is nonetheless a fantastic product. I keep it by the door so I can spray my face on my out and my makeup lasts all day, eyeshadow included!
Thursday, January 27, 2011
Bridal/Photography Worthy Makeup
![]() |
| Photo by Jessica Brown of MOONBelle Photography |
- One of the easiest yet most important steps to controlling oil and shine is to start with a primer before applying any other makeup. Smashbox's Photo Finish Foundation Primer Light is specially formulated to mattify your skin, which is exactly what you want for shine control and also keeps your makeup in place for the rest of the day.
- For foundation, you should avoid mineral makeup. It has more of a tendency to reflect light, which is great for every day wear but can appear too shiny in photographs. A liquid foundation with medium coverage that's oil-free will be perfect for covering any imperfections without looking too cake-y. Make Up For Ever's HD Invisible Cover Foundation is popular with makeup artists, but I've also been hearing good things about CoverGirl's NatureLuxe Silk Foundation if you want a cheaper option.
- Blush is another key element of picture-worthy makeup application. Even if you don't normally wear blush, it will prevent you from appearing too washed out in pictures. Again, any product with shimmer isn't going to photograph well so you'll want something matte. Laura Mercier's Second Skin Cheek Color comes in a variety of natural looking shades and lasts forever.
![]() |
| Photo by Jessica Brown of MOONBelle Photography Makeup by Laura Griffin of Applied Glamour |
- Your eyes will look best if you keep your eye makeup soft, classic, and simple. Use a grey or brown eyeliner pencil to line the top of your lashline only for the most natural, wide eyed look. Smashbox makes beautiful photography-worthy eyeshadow trios to take all the guesswork out of coordinating shades. On Stage and Multi-Flash are lovely natural colors and will give the illusion of an effortless, no-makeup look. Like "Oh, yes, my eyes are this bright and lovely on their own!" Finish with a waterproof version of your favorite mascara.
- If you really want to wear false eyelashes, avoid the long strips. Those can lead to massive mishaps, as they have a tendency to come unglued in the most obvious way possible. Instead cut them in half or use the individual lashes toward the outer corners of your eye, and make sure to use waterproof glue! You could even have semi-permanent lashes professionally applied, which will last about ten days.
- To make sure your lipcolor lasts, start with a lip primer. A lipliner pencil just a few shades darker than your natural skintone will also help keep your lipstick in place. Use a lip brush to fill in with your lipstick, blot, add one more coat, and blot again. Your lipstick won't budge! Lipstick withstands better than gloss and looks better in pictures, by the way. Don't dismiss lipstick!
- Finally, make sure your maid of honor or photographer has some blotting papers on hand just in case your makeup smudges or your face begins to shine. Keep a compact mirror and your lipcolor handy for touch ups as well.
- Most important of all, enjoy your wedding! Don't worry about your makeup for the rest of the day. You look gorgeous! Cheers!
Tuesday, January 4, 2011
Lipstick 101: What to Do About Stains? Part Three
Here's a quick list of what to do if you find a lipstick stain on your...
Shirts
Apply hairspray to the stain and let it sit for a few minutes. Yes, hairspray! Wipe the hairspray off and the stain should come off with it. Your shirt can now be washed as usual.
Glassware
Stains on glassware can be particularly hard to remove. The ingredients designed to keep lipstick in place on your lips are fairly resilient on glass as well. You can erase any marks easily by rubbing salt on the stains before you wash the glass.
Cloth Napkins
I don't think I personally know anyone who uses cloth napkins, but blotting lipstick stains with a little bit of petroleum jelly before laundering is another useful trick to remove stains from cloth.
Silk (Or Other Fabric)
You can also take a piece of clear tape (masking tape will do as well), place it over the stain, and yank it off. Sounds odd, but the stain should also come with it. If you're dealing with a more stubborn stain, sprinkle a little bit of talcum powder and blot until the powder and the stain are gone.
Friday, December 24, 2010
Lipstick 101: Which Shade is for You? Part Two
Part one was all about the different types of lipstick formulas. Now here's part two, how to choose the perfect color!
The Basics
The easiest trick of all is to simply choose a color that's about two shades darker than the natural color of your lips. According to Bobbie Brown, these are the most natural and flattering shades. Head to a makeup counter where you can test out lipsticks, apply the color to one lip only, and compare. If it's a shade or two deeper than your bare lip, you've found a great color! Even if you plan to find a great lipstick at the drugstore or somewhere else you can't try them out, I'd recommend doing this first. You'll know what shades to look for.
Simple, right? If you want to try other colors like red (which, trust me, nearly anyone can pull off red lipstick), different shades flatter different skintones.
Fair Skin
If you're fair skinned, look for pink, berry, and red shades that have some blue-ish undertones. If you want to wear a neutral, try to find a peach color with a pink undertone. Loud pink shades should be avoided.
Medium Skin
If you have a medium skintone, shades with yellow undertones will look better. You can wear deep reds in addition to pinks with brownish undertones. For neutrals, you can even wear warm brown shades. Just make sure to avoid super pale browns.
Dark Skin
Those with dark skin look good in deep reds with blue undertones and dark plum or even purple shades. Again, pale beige colors should be avoided.
![]() |
| Source: Wiscombe Art |
The easiest trick of all is to simply choose a color that's about two shades darker than the natural color of your lips. According to Bobbie Brown, these are the most natural and flattering shades. Head to a makeup counter where you can test out lipsticks, apply the color to one lip only, and compare. If it's a shade or two deeper than your bare lip, you've found a great color! Even if you plan to find a great lipstick at the drugstore or somewhere else you can't try them out, I'd recommend doing this first. You'll know what shades to look for.
Simple, right? If you want to try other colors like red (which, trust me, nearly anyone can pull off red lipstick), different shades flatter different skintones.
Fair Skin
If you're fair skinned, look for pink, berry, and red shades that have some blue-ish undertones. If you want to wear a neutral, try to find a peach color with a pink undertone. Loud pink shades should be avoided.
Medium Skin
If you have a medium skintone, shades with yellow undertones will look better. You can wear deep reds in addition to pinks with brownish undertones. For neutrals, you can even wear warm brown shades. Just make sure to avoid super pale browns.
Dark Skin
Those with dark skin look good in deep reds with blue undertones and dark plum or even purple shades. Again, pale beige colors should be avoided.
One more thing:
Also keep in mind the season; sometimes shades that look absolutely ridiculous in fall or winter will look gorgeous in the summertime, and vice versa. For example, I have a coral red that just looks silly this time of year. But I can't wait to wear it this summer!
Look for part three of Lipstick 101 to learn about how to get rid of annoying lipstick stains, coming soon!
Sunday, December 12, 2010
Lipstick 101: Which Type is for You? Part One
First, not all lipsticks are created equal. There are a lot of different formulas depending on the kind of finish you want, but most fall into one of the categories listed below.
Matte
Matte lipsticks have a "flat" finish; there is no shine or gloss, just thick opaque color. They last longer than other formulas and are great if you want a retro or more serious look, but beware: matte lipsticks can be extremely drying. Layer it over a lip primer (I've found lip balm also works well) and make sure your lips are exfoliated.
Moisturizing
Moisturizing is the opposite of matte. These lipsticks contain extra vitamins and moisturizing properties to add shine and keep your lips hydrated. They're much less drying due to less wax in the formula, but the color can fade quickly so you'll need to reapply more often.
Cream
Cream lipsticks are the best of both and kind of an in-between. The color isn't as flat or pigmented as a matte lipstick, but it's not as shiny as a gloss or moisturizing lipstick. It doesn't last as long as matte, but doesn't wear off as quickly as moisturizing. Most lipsticks will fall into this category.
Other Types
Long wearing lipsticks are designed to last much longer than regular lipsticks. They are the most drying of all and usually come with a primer or gloss to help seal in the color and keep lips moisturized. Frost lipsticks are a little more shimmery and typically come in pale colors. If you insist, use extra caution with these to avoid looking like you're stuck in the 1980s. If you want shine, go with gloss.
Now that you know the different types, it's time to pick a color! Part Two of Lipstick Buying 101 will tell you all about how to choose a shade that looks best on you.
Friday, December 10, 2010
Easiest Retro Eyeliner Trick Ever
But guess what? Ever since I discovered this nifty little trick, I've achieved a flawless cat eye every time. Take your credit card (or driver's license, rewards card, what have you) and line it up with the corner of your eye at about a forty-five degree angle. Use it as a straight-edge to extend your eyeliner upwards past your lash line just a little, and voilĂ ! Instant winged eyeliner, perfectly even on both sides! Experiment with the angle and placement of the card for a little variety.
This look obviously calls for liquid black eyeliner. My favorite has an utterly ridiculous name, but is super cheap and even easier to use. InColor FabuLiner is $2 at the drugstore and looks like a tiny Sharpie. It's perfect for drawing on a thin, precise line but you can also make thick lines for more dramatic definition. Bonus: it never, ever smudges. If black is too harsh for you, try CoverGirl's Perfect Point Plus eyeliner in charcoal. It isn't liquid, but grey eyeliner is softer, equally chic, and a little more modern. Ms. Bardot would be so proud.
Sunday, November 21, 2010
Winter Complaint: Chapped Lips
It's that time of year again! Seasonal changes can cause major shake-ups in your skin and hair routines. Winter weather hits and suddenly your skin is dry and flaky, your hair is a static-ky mess, and your lips are chapped and painful. But don't fret! Getting rid of chapped lips easy!
Take note: the information provided here is for mild occurrences only. If your chapped lips are severe and/or chronic, you might want to seek a physician's advice. There are prescription treatments available and it could be indicative of something more serious than a winter annoyance.
First, exfoliation helps tremendously. Dampen the edge of a washcloth and rub it over your lips until they're smooth. This gets rid of the dry flaky skin less painfully and way more effectively than biting your lips (yeah, we're all guilty of it sometimes).

After you've exfoliated, apply a thick layer of one of Philosophy's super moisturizing Lip Shines before bed and leave it on overnight. I swear, you'll wake up with brand new lips. This is a whole level up from the likes of Chapstick and Carmex. They come in about a million delicious flavors (I'm partial to Red Velvet Cake) and release new flavors pretty frequently. And since they've dropped in price, they're now only ten dollars! I've tried other products but always go back to this one to treat my chapped lips. It really works.
Now that your lips are no longer chapped, the final step is prevention. You could keep using your Philosophy Lip Shine, but I personally can't stand that kind of thick lip gloss texture during the day so I prefer to use lip balm. This is when classic cherry Chapstick comes in handy. Burt's Bees is also extremely popular. Whatever lip balm you like, the key is to choose one that is moisturizing and sun protecting. Lips are more susceptible to sunburns so try to pick a balm that contains SPF.
Lip balms are everywhere and generally pretty cheap, so it's super easy to experiment. This winter I'm trying out the Smooth Spheres line from eos. The packaging is clever and fun, the application couldn't be more perfect, and it does a fantastic job of keeping my lips smooth and hydrated. Plus, it's all natural, smells delicious, and is only three dollars! Who could ask for more? This company is genius.
Take note: the information provided here is for mild occurrences only. If your chapped lips are severe and/or chronic, you might want to seek a physician's advice. There are prescription treatments available and it could be indicative of something more serious than a winter annoyance.
First, exfoliation helps tremendously. Dampen the edge of a washcloth and rub it over your lips until they're smooth. This gets rid of the dry flaky skin less painfully and way more effectively than biting your lips (yeah, we're all guilty of it sometimes).

After you've exfoliated, apply a thick layer of one of Philosophy's super moisturizing Lip Shines before bed and leave it on overnight. I swear, you'll wake up with brand new lips. This is a whole level up from the likes of Chapstick and Carmex. They come in about a million delicious flavors (I'm partial to Red Velvet Cake) and release new flavors pretty frequently. And since they've dropped in price, they're now only ten dollars! I've tried other products but always go back to this one to treat my chapped lips. It really works.
Lip balms are everywhere and generally pretty cheap, so it's super easy to experiment. This winter I'm trying out the Smooth Spheres line from eos. The packaging is clever and fun, the application couldn't be more perfect, and it does a fantastic job of keeping my lips smooth and hydrated. Plus, it's all natural, smells delicious, and is only three dollars! Who could ask for more? This company is genius.
Subscribe to:
Posts (Atom)